

Build News Aggregator Website With Elementor And Feedzy
In Depth Tutorial Step By Step By Elementor
Surprisingly, news aggregator sites still get loads of traffic, even today, because, as we all know, internet traffic equals money
How to Build a News Aggregator Site Using Elementor and Feedzy
News aggregator sites have existed since the early days of the Internet; some still doing exceptionally well. In this in-depth tutorial, we’ll show you how to build a news aggregator site with Elementor and Feedzy.
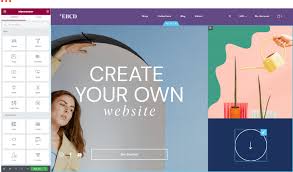
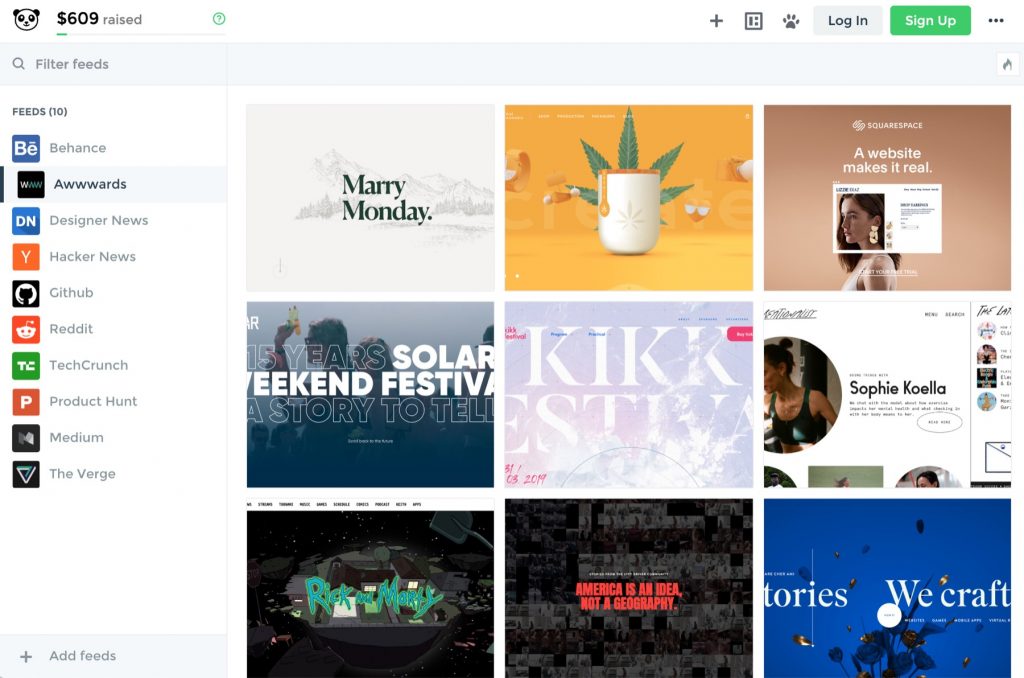
I’m willing to bet that you consistently visit at least a couple of aggregator sites, perhaps without even realizing it. Metacritic is an excellent example of such a website (currently ranking among Alexa’s top 2000 sites). Only instead of news, it aggregates reviews from across the web. Another example, Techmeme — has become a go-to site for all tech-related stories. Many of us frequent the more creative examples, like Panda — focusing not only on text but also on the beautiful visual previews of content from Behance or Awwwards.
So if news aggregator sites are doing so well, why not build one of our own and get a piece of that cake? How hard can it be?
Apparently, it’s not hard at all. In fact, you could set it up and running in an afternoon. All you need is WordPress, Elementor, a decent looking theme, a plugin called Feedzy, and this in-depth tutorial to show you how to make it all happen.
Getting Started
Here’s a sneak peak at the final result we’ll be aiming for throughout this guide:
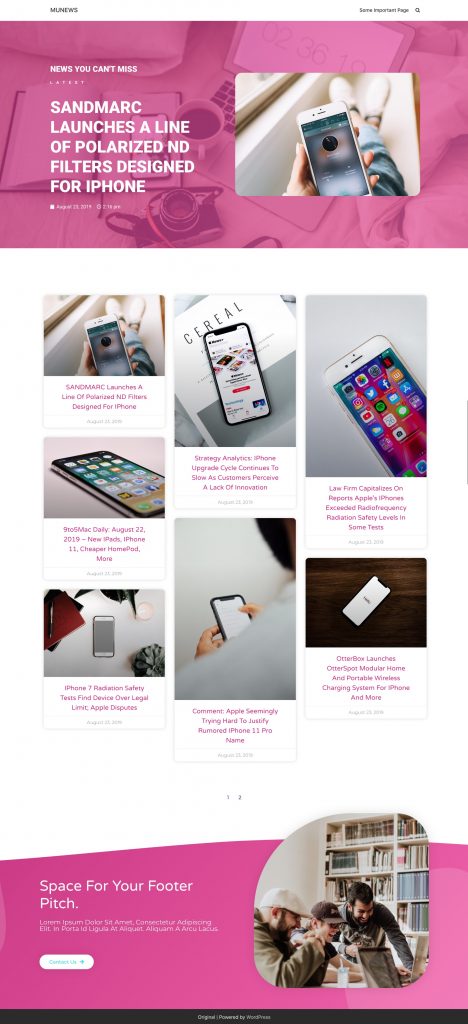
Granted, this is just a screenshot of the design, but you can already see all the individual elements pretty clearly.
For the most part, it looks like a normal news site. It has that design quality we’d expect in a magazine’s contents section, with a good distribution of the items in the page’s news-feed; the hero section at the top highlights the most recent or main story.
Note: No time to read? Just grab the downloadable template at the bottom of this page.
Here are the tools used:
What Makes a Quality Content Aggregator Website?
A genuine quality news aggregator site must include the following elements:
- Quality content from quality sources
- Quality content importing mechanism
- Quality design that is functional and easily recognizable
It’s no accident that quality content sources come first. If you get this step wrong, none of the other ones will matter. The reason that we’re leaving our designing till last is that this type of site is naturally content-heavy, and would be difficult to design without knowing what the content will be or look like.
A quality content source must be PURE:
- Predictable
- Uniform
- Righteous (credible, authoritative, perhaps noble)
- Eloquent (carrying the right tone)
Okay, I might have stretched the thesaurus there a bit to get this acronym, but it works better when we break it down:
- Predictable – Our content must have an element of predictability for our readers to know what to expect. If we want to publish 5 items a week/month we have to be consistent. This should also be a consideration for picking our content sources. They too should have similar predictability.
- Uniform – Our content should look and feel familiar, and the way that we achieve that is through consistency in things such as layout, length, and tone.
- Righteous – Our sources should be credible and respected.
- Eloquent – Our content must also carry the right tone. Content that conveys the author’s passion and honest, makes it more relatable. These, together with credibility, are all factors that play a part in motivating a reader to share the items on your aggregator.
It’s entirely up to us to find our sources and define our content, so long as we can check them off on the list of traits above.
Regardless of how PURE your content is, we should publish content that we generally identify with. The last thing we want it to accidentally publish something that puts us on the wrong side of the political barricade, so to speak.
Fetching the Content
As previously stated, having a quality content importing mechanism is essential to the quality of our site.
The first steps are simple:
- Get a regular WordPress website up and running
- Install and activate the Feedzy plugin.
Feedzy is an RSS aggregator plugin, with an “RSS to post” feature that allows you to import content instead of just supplying you with an RSS widget to put in the sidebar.
On top of that, you can filter through the imported pieces of content and curate them actively – deciding what to publish and what not to.
Installing Feedzy
- Install the free edition of Feedzy (available at WordPress.org)
- Then install the Feedzy Pro alongside it.
- Activate both plugins and enter your license key.
So far, it’s a pretty standard process.
Once installed, on the WordPress dashboard, go to Feedzy → Feed Categories and add a new category. Give it an appropriate name, and then in the field below, copy and paste the URLs of your sources. It’s important to provide the accurate URLs (of the sources) for the RSS feeds of the sources.
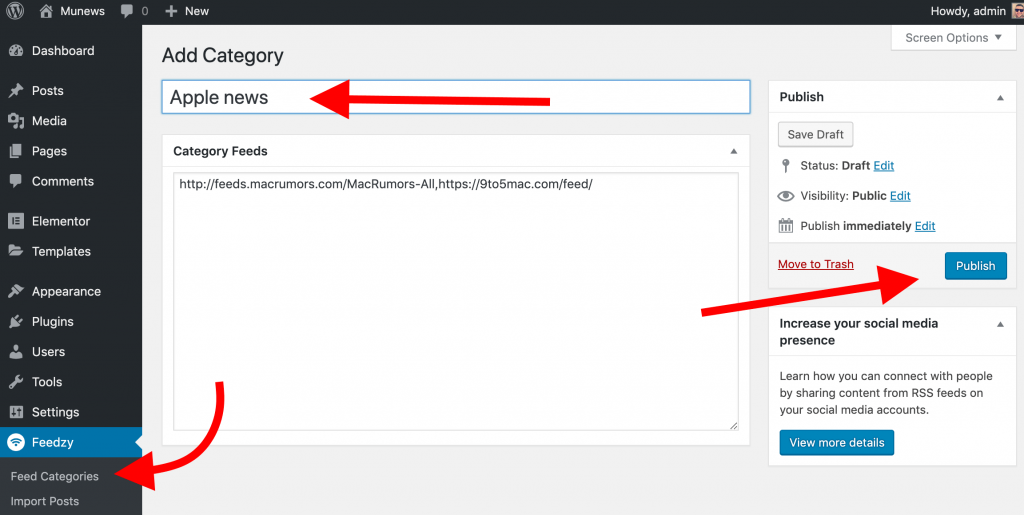
Click on Publish, to publish the category and then, once the Feed Categories window appears, grab the slug from the listing table (we’ll need it in a sec.).
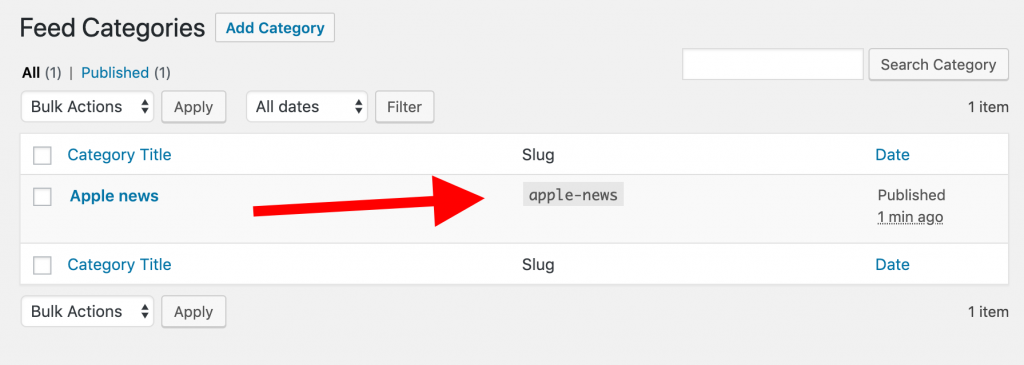
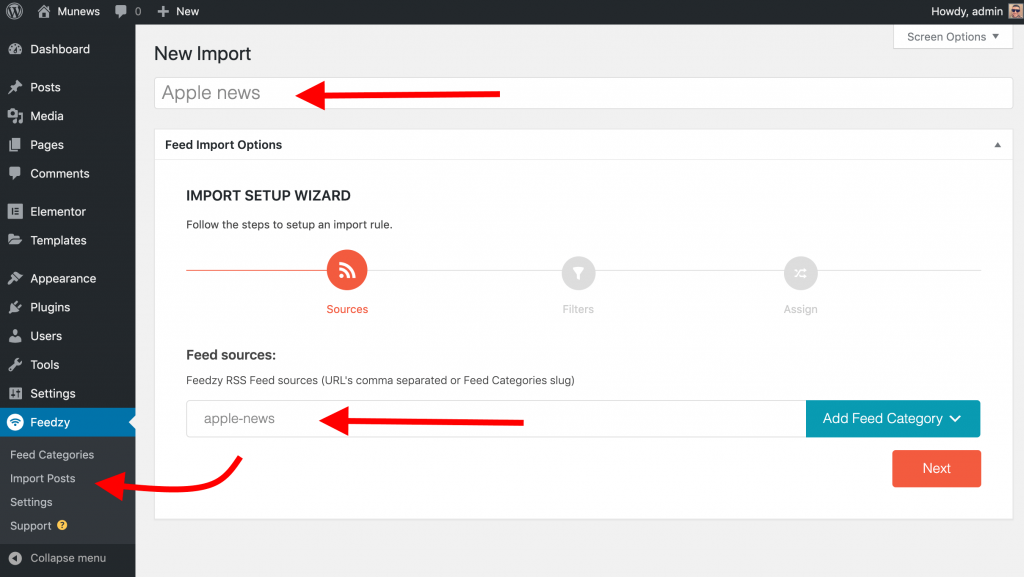
Now go to Feedzy → Import Posts and create a new import by giving it a title and pasting in the Feed Category slug that we grabbed earlier.
Click on Next.
If you’re fetching content from one big site or from many sites, it’s best to set up a Feed Filter for the incoming posts by defining either the positive (display) or negative (exclude) keywords. You can also use this to limit the number of feed items you import each time.
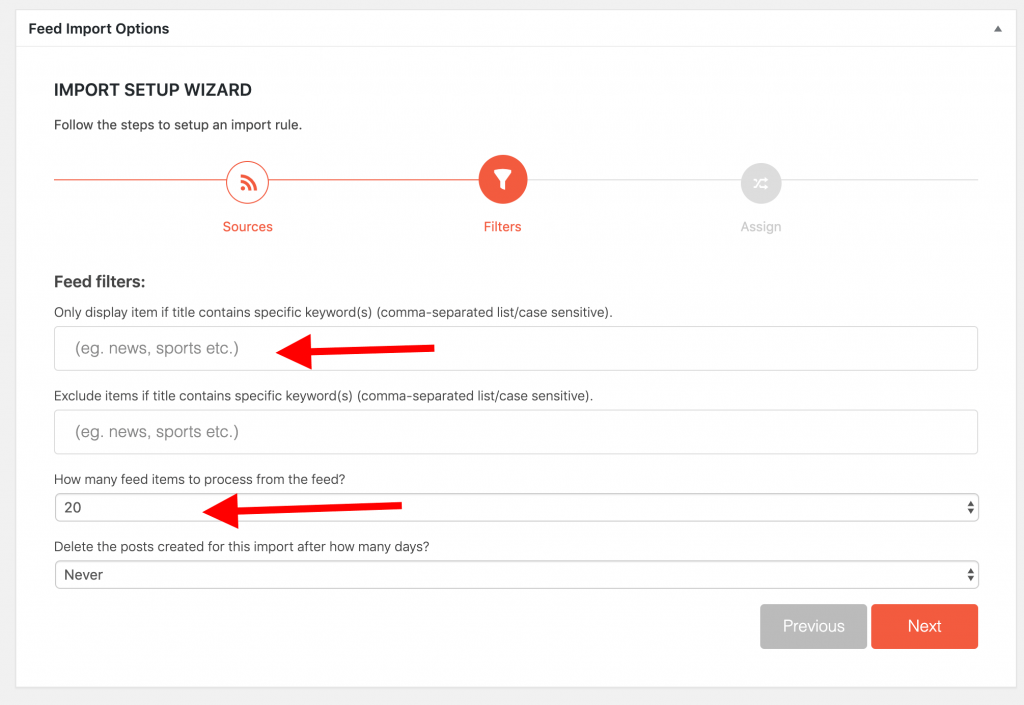
At this point, we should do some fine-tuning to perfect the way that content is fetched and added to our site’s database. Here we’ll find a good range of settings.
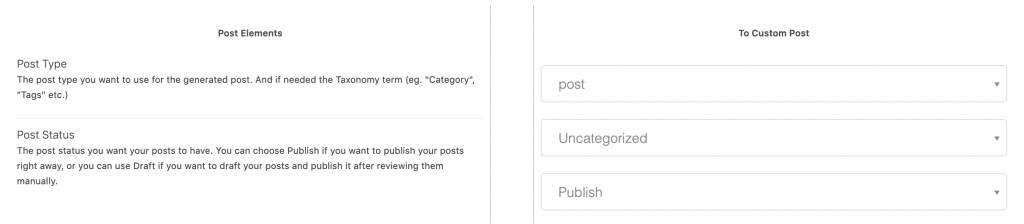
The first three are pretty self-explanatory.
You’ll probably want to save your imported content as posts. As for the category, it’s best to create a new category for all aggregated content. And lastly, the post status is up to you, depending on whether you want to review/curate the content before publishing it, or you prefer the site to run automatically (select Publish or Draft).
The remaining fields define the way we want the posts to be presented on the site.
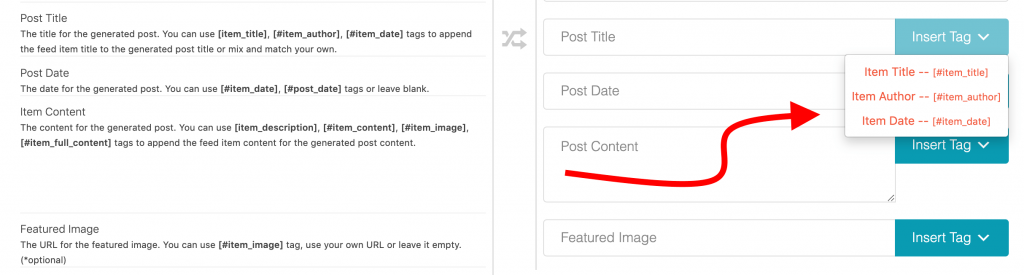
Notice that each option has a number of shortcodes that you can use. You can include them in whatever order to get the structure that seems to fit best.
Let’s take a look at the Post Content field.
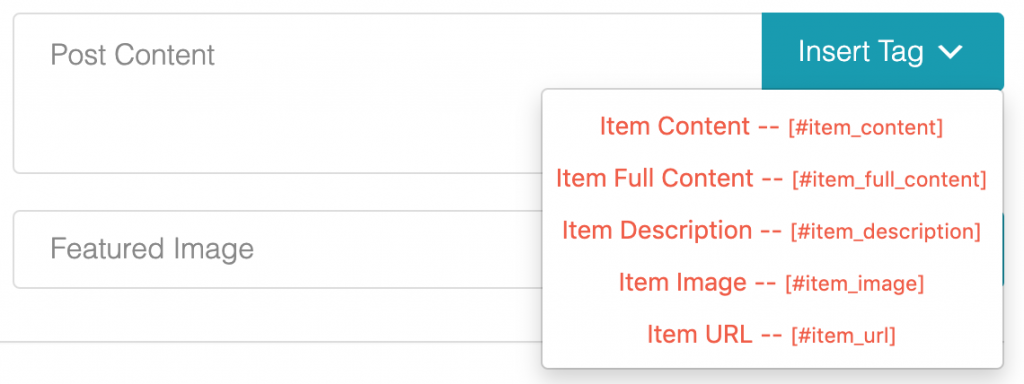
We can choose to import the RSS feed content, the item’s full content, the description, and even the image and URL of the original item.
To do the original source justice, you probably shouldn’t import the full content, but instead, settle for the description and the URL of the source.
You can also choose to import the featured image from the original source. Alternatively, you could try this cool trick, and in the image field, enter the following line: https://source.unsplash.com/random
This URL will return a random image from Unsplash. Of course, you can step in and manually edit each imported post later on, just to get it to look exactly like you want it. After all, they are standard WordPress posts.
When you’re done here, click on Save & Activate. You’ll be taken to the main listing of your content imports.
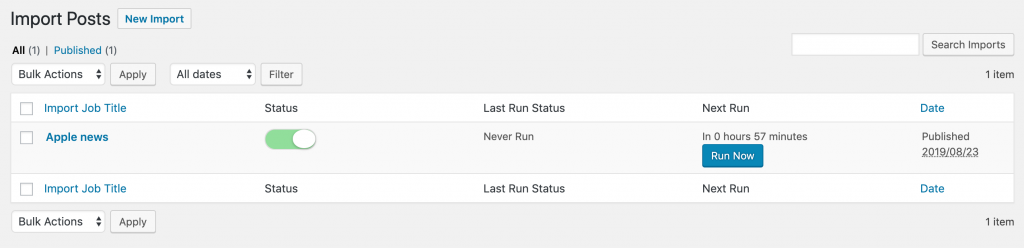
All imported posts can be found in the Posts section of the wp-admin. They’re going to be either published or saved as draft based on the import settings you’ve set.
Even though it’s been a fairly simple process, it still feels like so far it’s been all work and no play. With our content set up and ready, we can get started with the fun part and design our site.
Getting the Core Design in Place
Saying that we’ve been saving Elementor for the design phase, is synonymous with saving the best for last. It not only gives us some great layout options and good typography, and as a bonus, it already provides us with the purpose-built Hello theme, that allows us to custom-build our own theme elements and templates.
For this example, I’m going to use Neve since it’s currently one of the most popular themes in the official WordPress directory (but probably because I also work for the company that developed it).
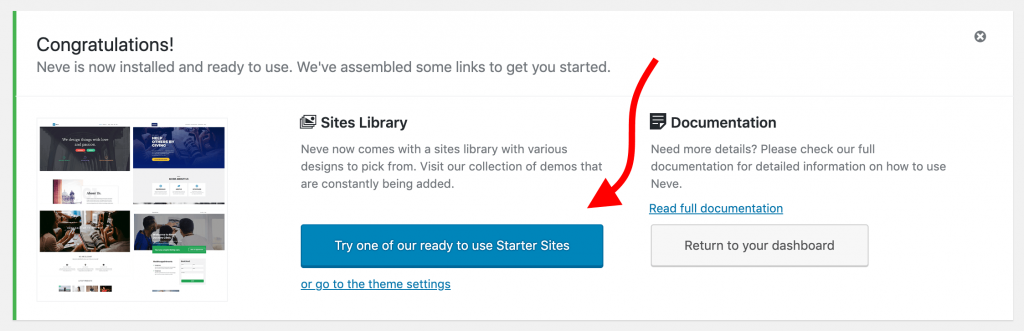
Installing Neve that same way you would any other WordPress theme. Just go to Appearance → Themes and add the theme by importing it from WordPress.org, then activate it.
Once you’ve activated Neve, I recommend importing a starter design just to get proper typography settings in place. I find that the main starter site – called “Original” – works great for this.
Important: When importing the starter site, make sure that you deselect the option to include the demo content. (We’ll be building our homepage in Elementor).
Create an “Archive” Template
As our content will be saved as posts, WordPress will be archiving them.
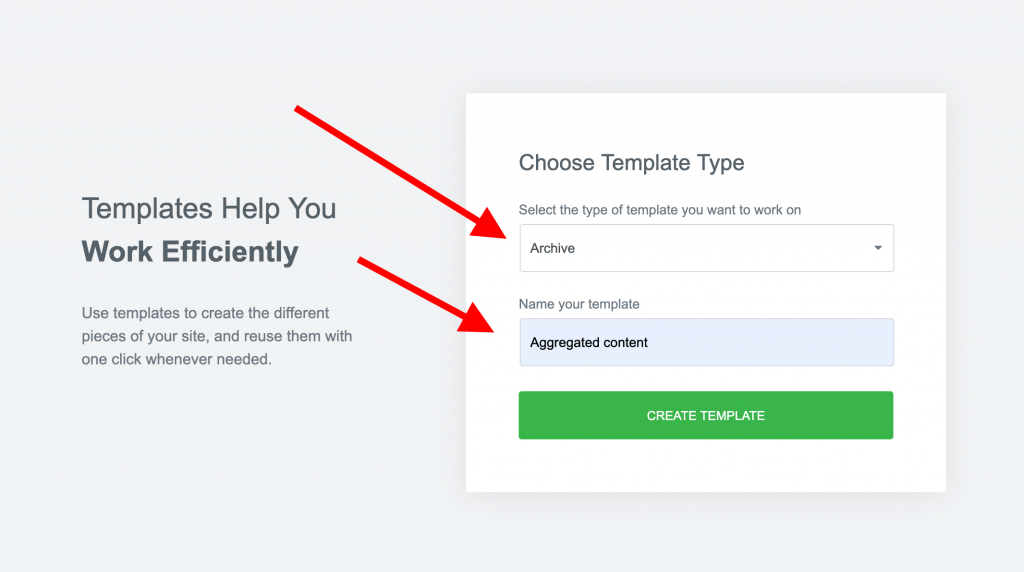
To spruce up our archive, go to Templates and click on Add New.
Select Archive as the type of template. Give it a name.
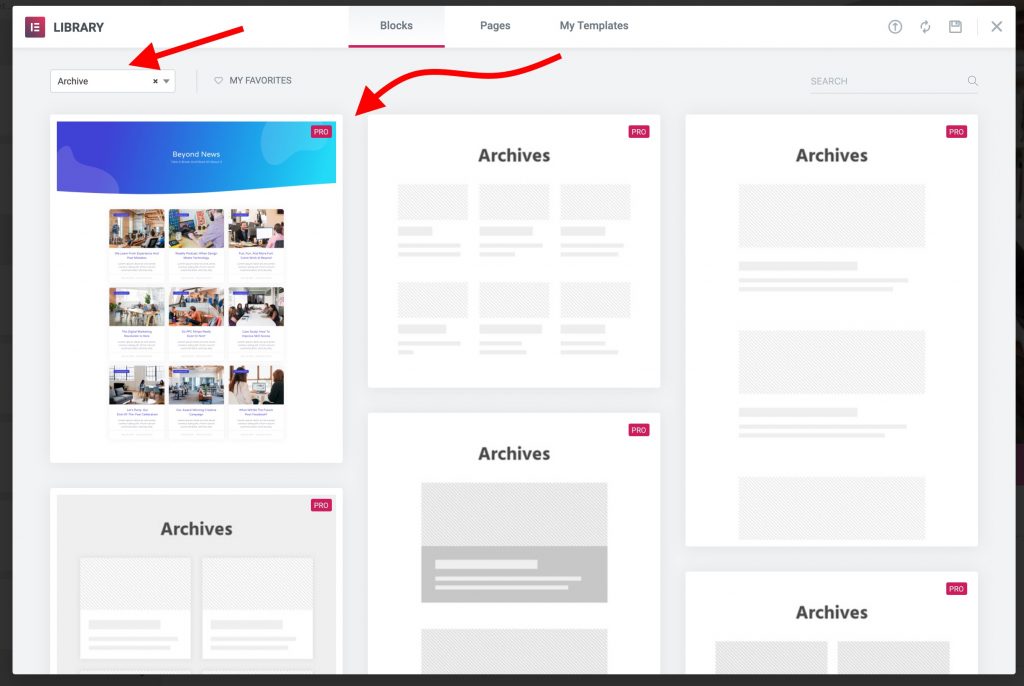
From the template selection pop-up, click on the Blocks tab, filter the search to only show templates for Archive and pick the one you like. This is the one is my choice:
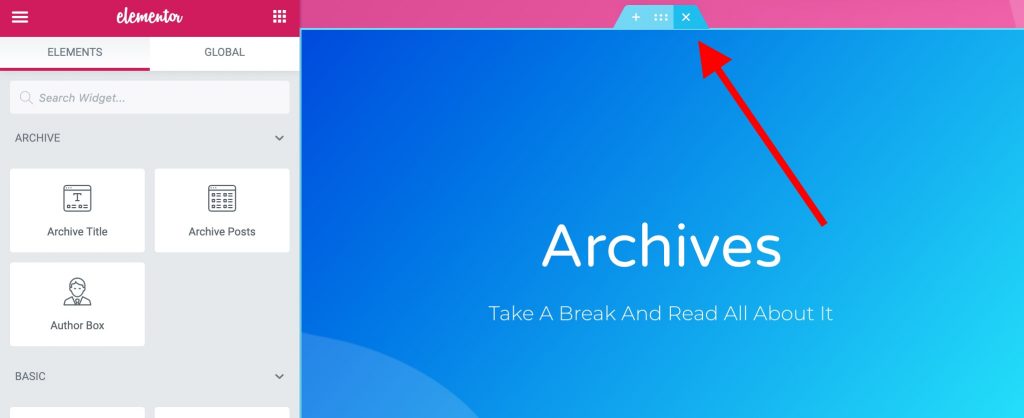
What we’ll get is a complete archive page that looks almost perfect right out the box. We’ll only make a couple of changes.
Because the first batch of our content has already been imported, we can get an idea of what the page will look like when we’re done.
First, we’ll remove the top section with the “Archives” heading.
Next, we’ll edit the main section that lists our posts. Click on the column’s pen icon and then adjust the settings to your preferences. You can find my settings below.
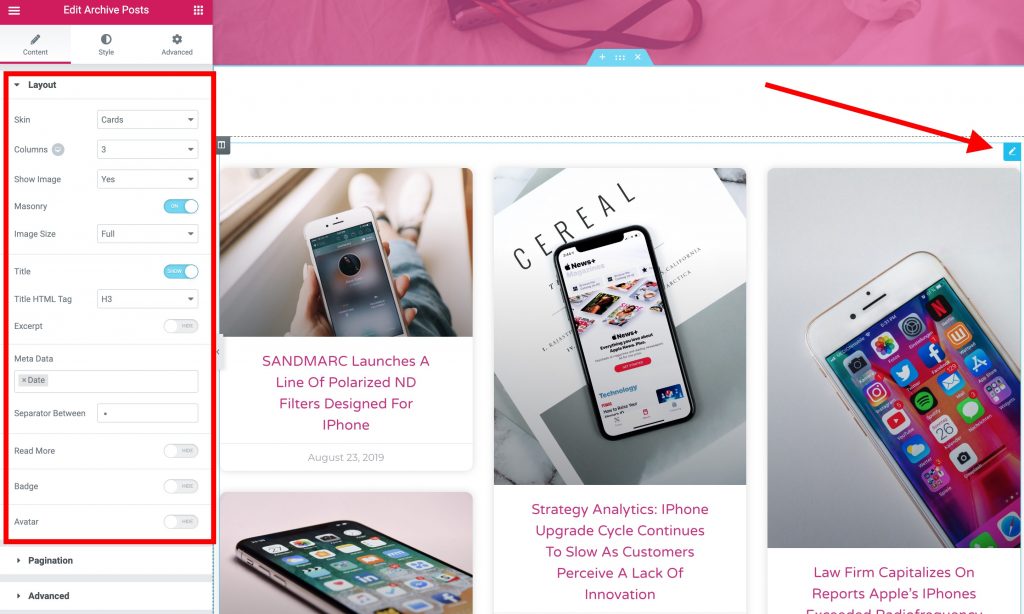
In the editor (left panel), I also went in to the Style tab to change the color of the headlines and set the gap between columns and rows to 30.
Right below the posts section, there’s a section with an additional call to action. You can put whatever you want there. I just changed the background color to match the overall aesthetic that I’m going for in this design.
Next, we need a good-looking hero section, at the top, to highlight the most recently imported post.
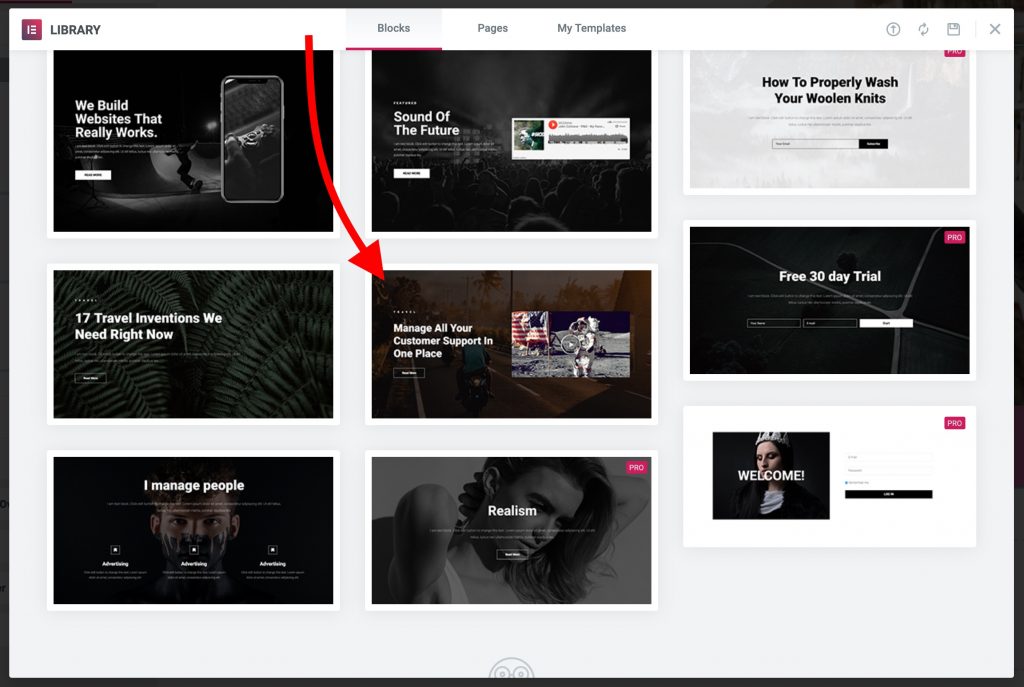
To do this we’ll add one of Elementor’s pre-made templates. This time, we’re going to filter the list to show only hero sections and pick this one:
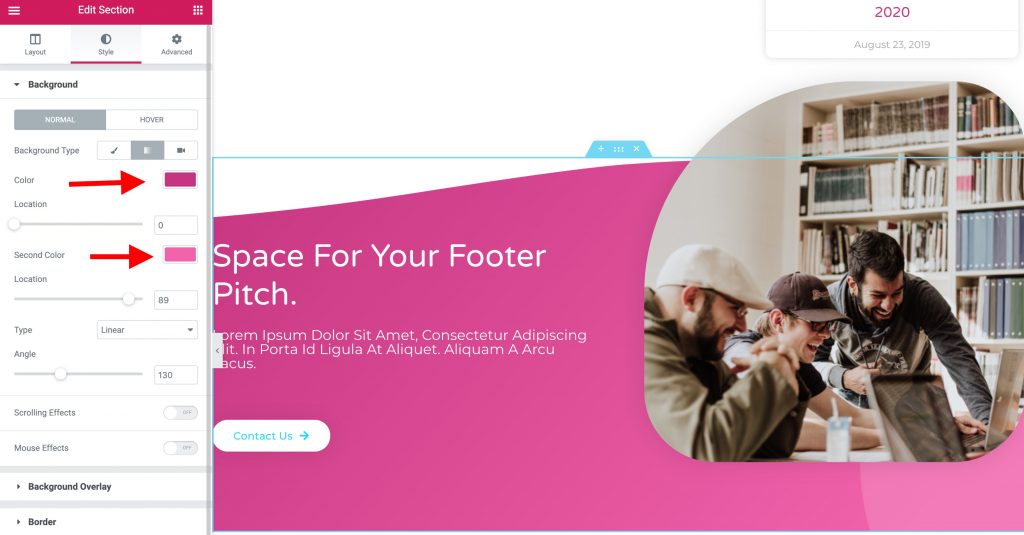
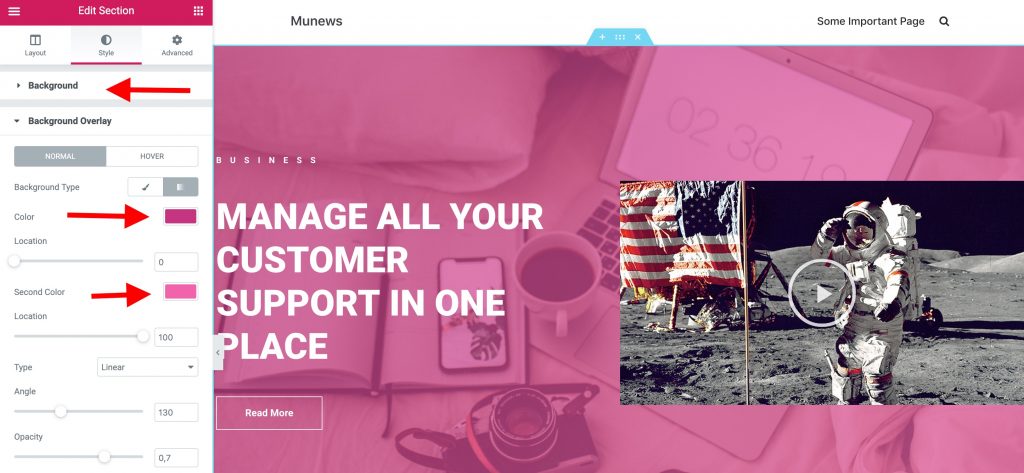
We’ll move it all the way to the top of the page, and change the background to something that matches the niche. I’m also going to change the color scheme.
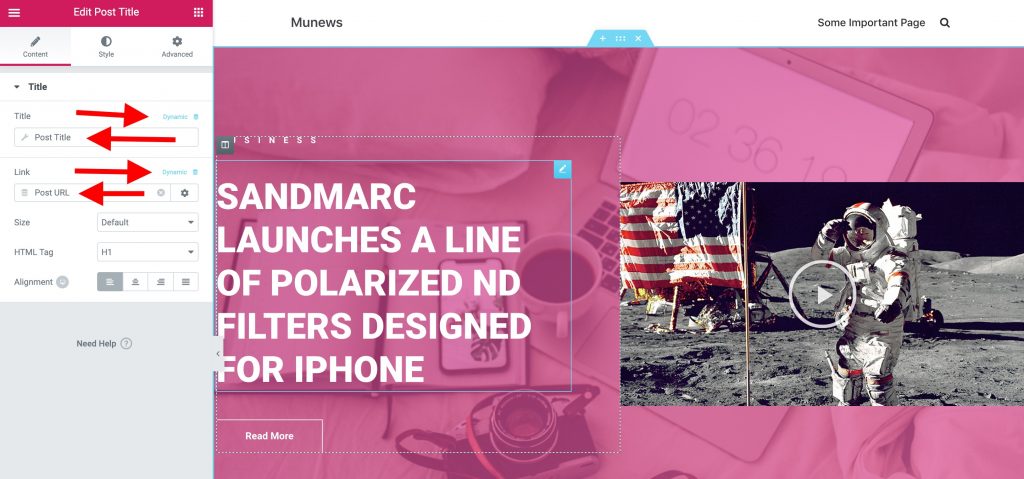
Next, we’ll make the headline dynamic so that it will always display the title of the most recent post. We do this by clicking on the headline widget and in the editor, selecting the Title’s Dynamic option, then pick Post Title from the list. Do the same for the Link parameter – click on Dynamic and select Post URL from the list (as shown below).
Let’s add one more widget just below the headline, called Post Info, and we’ll use it to display the publication date and time.
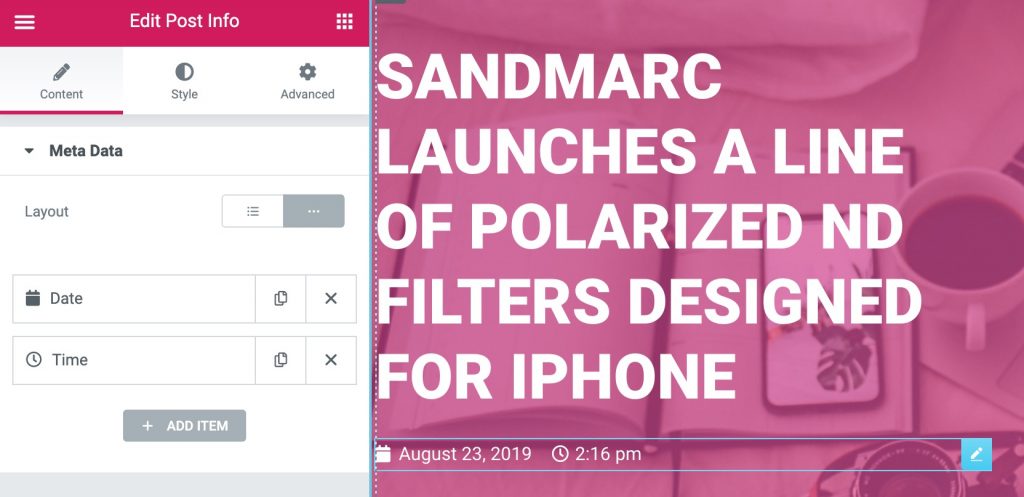
Now we’ll also edit the text widget that’s above the headline and change it to something more relevant. Lastly, as we won’t be needing the Read More button, let’s remove it.
Here’s the result:

Now it’s time to do something about that video widget on the right. We’re going to switch that to display the featured image of the post instead of a random video.
To do this, we’ll use a widget called Featured Image and link it to the post’s URL via the Dynamic options:
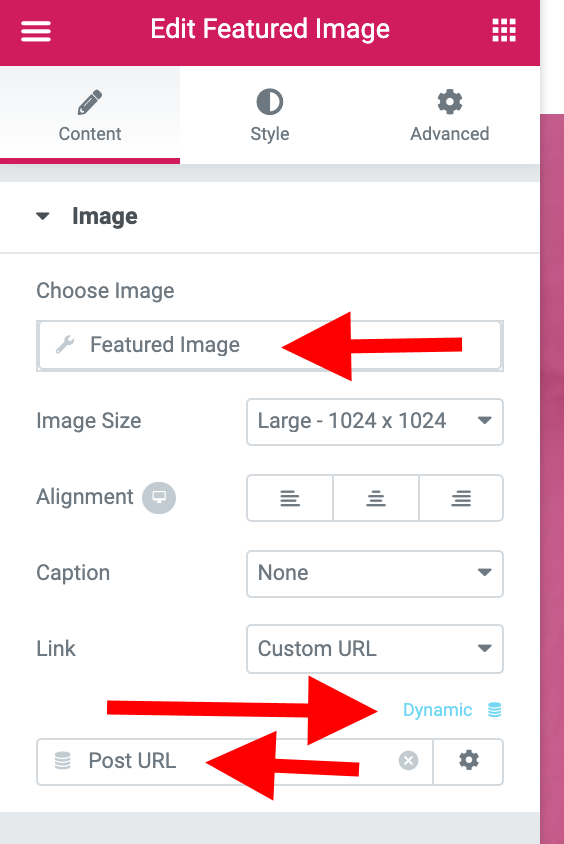
You could also go into the Style tab to add some border radius, as I have done. Here’s the final result — our new hero section in all its glory:

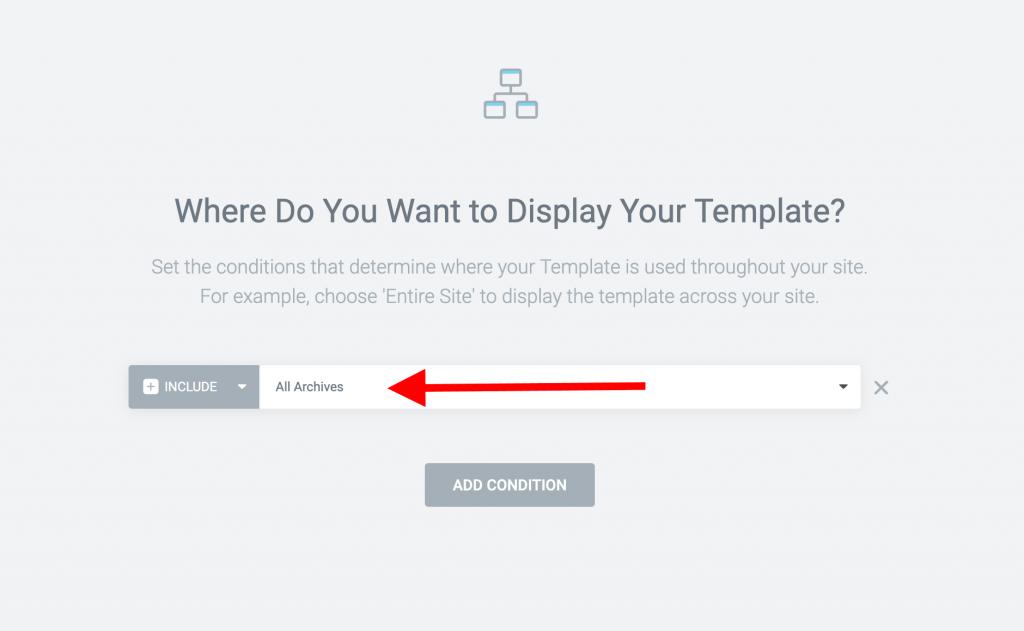
When it comes to the page design of a news aggregator site, it’s so simple and yet so effective. All that’s left to do now is to assign it as the main archives page for your blog posts.
It’s time to click on the Publish button and set the display conditions to All Archives.
This is what our news aggregator homepage looks like now that it’s done.
Create a Custom Single Post Template (Optional)
If you want to take things further and customize the way that the individual posts are displayed, then what you’ll want to do is create a new single post template.
I wrote an in-depth guide on how to do this a while ago. Feel free to read it.
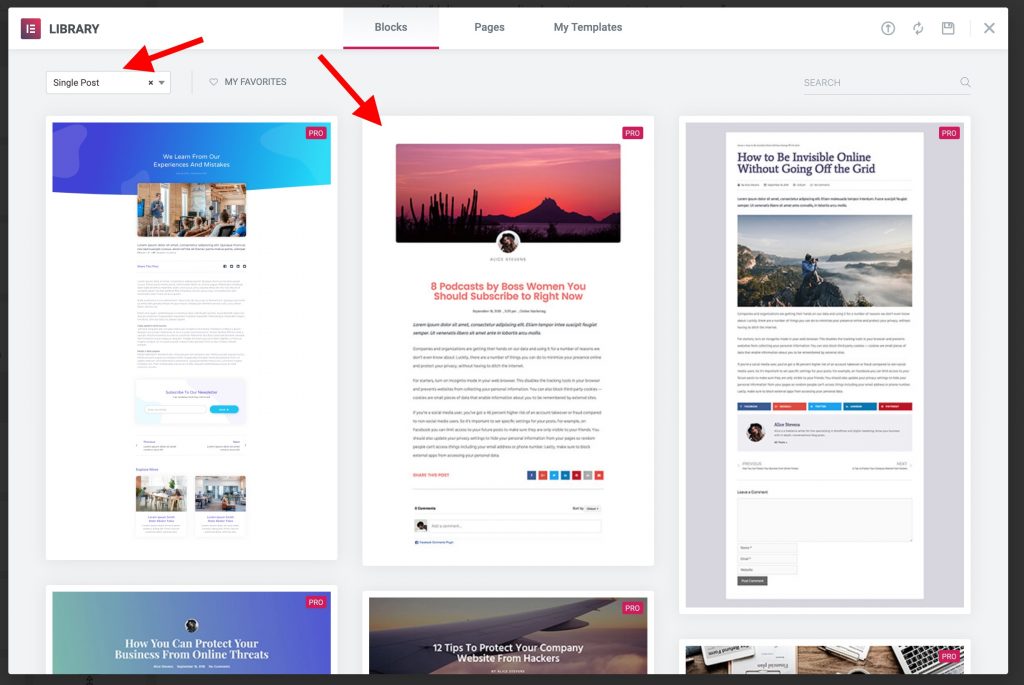
You can design a new single post template very quickly in Elementor. Begin by going back to the WordPress dashboard to Templates and clicking on Add New. This time we’ll select Single Post from the dropdown menu, give it a name and click Create Template.
When the library opens up, use the filter options to bring up the ready-made designs for single posts, and select one that you like. Personally, I went with this one:
After making the headline a bit smaller and adding a slight border radius to the featured image, I got this result:

Looks good, if you ask me!
Done!
We’ve just learned how to build a news aggregator site using Elementor and Feedzy. I hope this has been helpful and that you’re already on your way crafting your aggregator site!
Oh, and here’s that page template I promised you at the beginning. You can import it just like any other Elementor template.
ShareShare on facebookShare on twitterShare on linkedinShare on whatsappShare on email